File nesting in VS Code
Update: As of v1.67, the “file nesting” feature described bellow is considered “stable”. This is reflected in the post where it makes sense.
VS Code v1.64 was released a few days ago and it’s once again packaged with nice new features and improvements. An exciting new feature is the Side Panel* that can be opened opposite to the Primary Side Bar, i.e. the “other side of the screen”, giving you the option to have more views open at once. That can be quite useful on bigger screens.
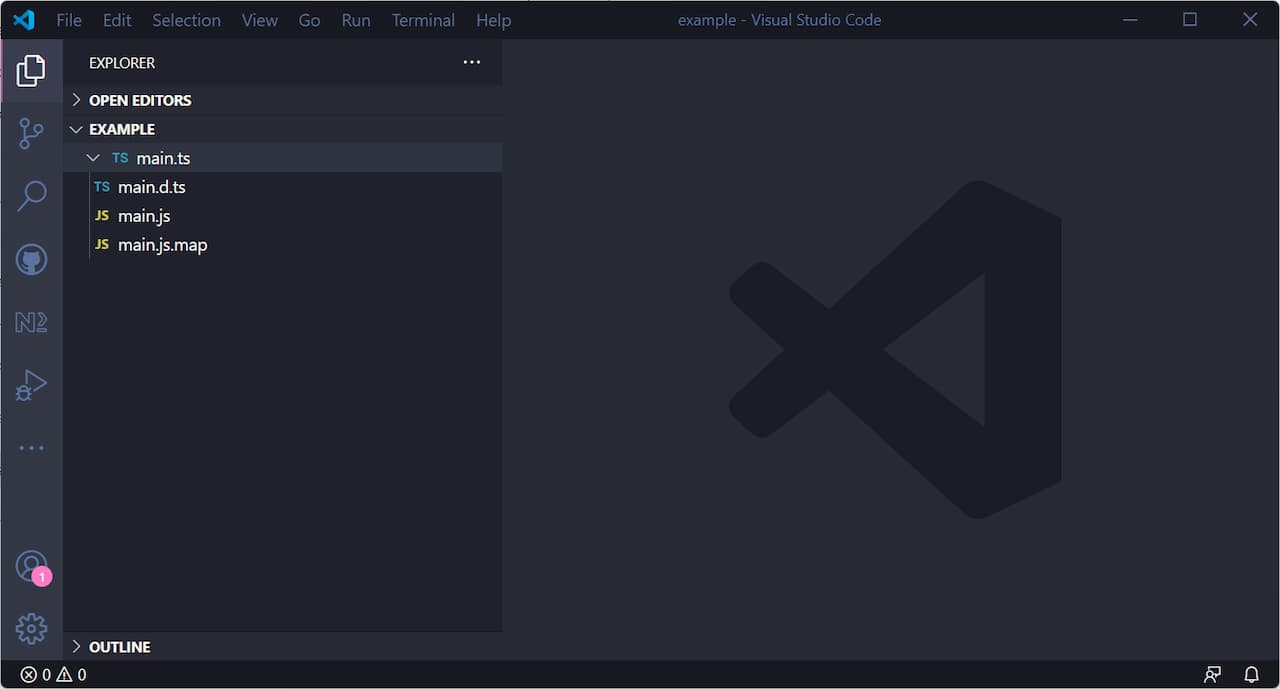
Another new feature that catched my interest was the experimental support for file nesting. This feature lets you visually “nest”/group related files under a “root” file in the same directory. For example, say you have a main.ts file and next to it you have main.js, main.d.ts and main.js.map. After enabling the file nesting feature and configuring it, VS Code will visually group the main.* files under the main.ts file, as shown in the following screenshot:

You can now “collapse” the main.ts file and reduce the “clutter”. Note that the files are still in the same directory, they are just visually “nested” under main.ts.
How to enable and configure file nesting
There are three new settings:
explorer.fileNesting.enabled- Controls whether file nesting is enabled.explorer.fileNesting.expand- Controls whether file nests show as expanded by default.explorer.fileNesting.patterns- Controls how files get nested.
Note: The above description is taken from the release blog post.
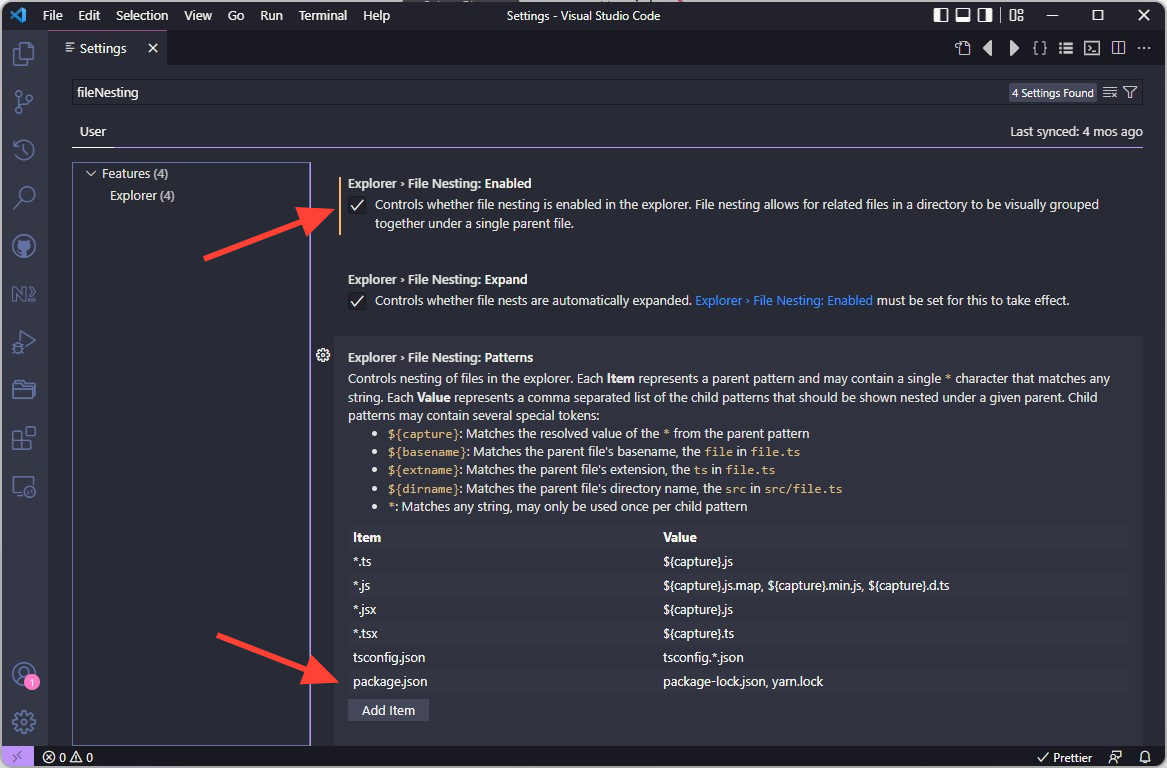
After updating to VS Code v1.67, file nesting will not be enabled by default. Go ahead and do it by toggling the “File Nesting: Enabled” setting. If you do it while you have a project open, you might notice that the files package-lock.json and yarn.lock files get nested under package.json. That is because VS Code has a default list of patterns that it uses to nest/group files. The package.json pattern is part of that list, as is the main.ts example described earlier. Can you find the patterns in the screenshot below?

Creating your own patterns
Well, now you know how file nesting works. I think by using the examples provided in the Patterns list, you can come up your own patterns.
In the next section I’m going to show you some use cases where file nesting can come in handy.
Use cases
Grouping config files by service, tool, type, etc.
Almost all front-end projects these days rely on a handful of config files to connect to a service, configure a framework or a tool. All those files end up in the root folder making it look like a mess. You can use file nesting to organize some of those file. An example could be grouping package-lock.json, yarn.lock, .npmrc and .yarnrc under package.json, Jest config files under jest.config.js, ESLint files under .eslint, etc. Check out File Nesting Config for VS Code repo for inspiration of possible groupings.
File nesting for Angular developers
When working with Angular components we often follow the file structure convention where a component is represented by several similarly named files. For example, next to button.component.ts, we might also have *.component.html|css|scss|spec and button.module.ts. So for a single component we might end up with four or five different files in the same directory. Wouldn’t it be nice to group most, if not all, of them under the main *.component.ts file and declutter the folder? Well, we can certainly do that now.
Open the file nesting settings and add a new pattern under the Patterns list. You can copy the following example and modify it to your preferences:
// Item           // Value
"*.component.ts": "$(capture).component.html, $(capture).component.scss, $(capture).module.ts, $(capture).component.spec.ts"
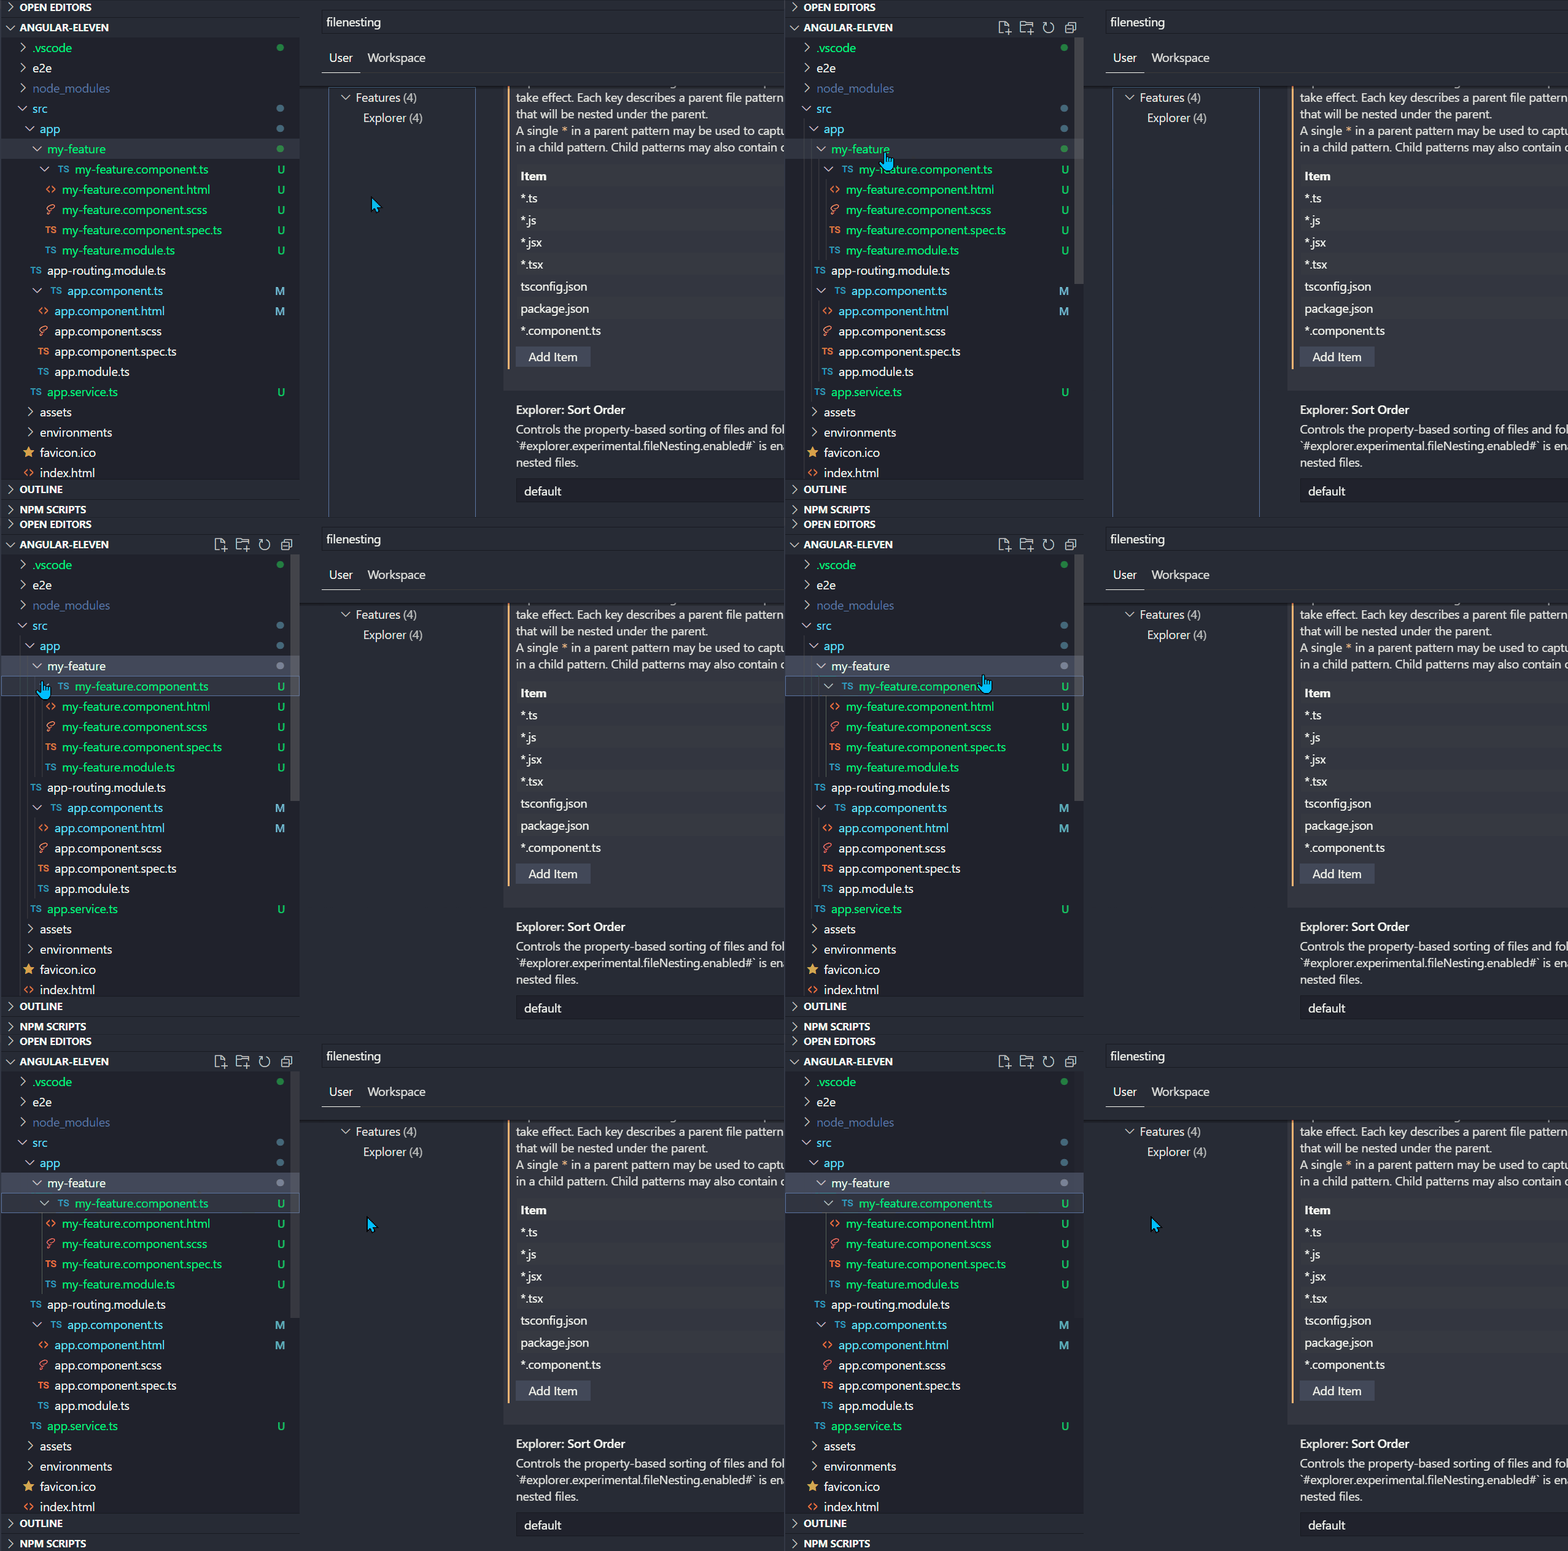
VS Code will now visually nest any *.component.html, *.component.scss, *.component.spec.ts and *.module.ts files under *.component.ts, as seen bellow:

I hope you learned a nice little tip. 🎉
* Renamed to “Secondary Side Bar” in v1.66.